Update 2nd of March 2012:
As it turns out, the latest version of nopCommerce doesn’t work with OM12 APM. Instead, read this posting all about two alternatives.
AVIcode, used for monitoring .NET applications is up to SCOM R2 a set of separate modules and additional infrastructure which has to be bought, licensed, installed and configured separately. However, with OM12 AVIcode is integrated and rebranded to APM (Application Performance Monitoring).
APM is really something special and adds so much more to the overall monitoring capabilities of OM12. Actually, it’s a world on its own. So when one runs an OM12 test environment it’s good to put APM through it’s paces as well so one knows how to configure it in production environments.
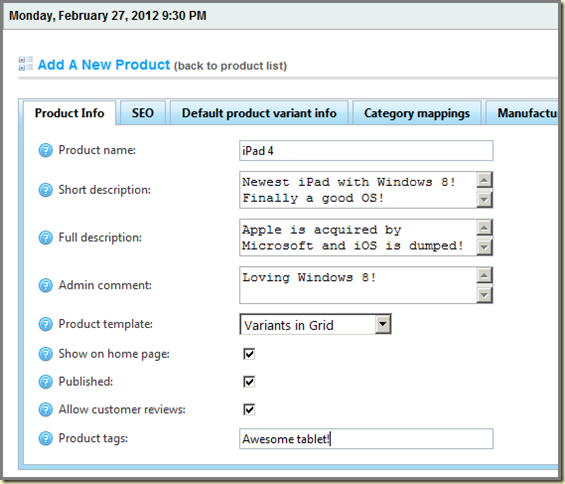
But how does one create a .NET application on the fly based on IIS 7.0? The answer is really simple: you DON’T! You download a .NET application from the internet follow a wizard and in the matter of a few minutes one has a full blown .NET application running on IIS 7.0 at hand. This .NET application represents a web shop where one can order all kind of stuff and – as an administrator – add new items and modify existing items as well. So you can add the iPad 4 running Windows 8 for instance! One has to create some bogus transactions in the web shop of course in order for APM to collect some data, but at least one has the change to test APM. Nice!
This posting will be all about downloading, installing and configuring this .NET application based web shop, titled nopCommerce. 
There is much to tell so let’s start.
Requirements
- It’s best to have a SQL Server in place. The SQL Server hosting the OM12 databases can be used for instance;
- On the server which is going to host nopCommerce install the Web Server (IIS) Role with the most common Role Services;
- Install .NET Framework 4.0 as well.
A: Download & Installation
- Log on with an account which has local admin permissions on the Web Server which is going to host nopCommerce;
- Go to this web page and hit the Install button;
- Click Install Now or wait a few seconds for running the Web Platform Installer 3.0;
- Click Run;

- Click Run;

- The installer files will be downloaded now. Just wait for some seconds;
- Click Install;

- In this setup I use another SQL Server so I select the option Use a remote server > Continue;

- Depending on your server an additional set of software (Microsoft or third party) and components will be installed and configured as well > I Accept;

- All software is being downloaded and installed. Be patient;

- Select New Web Site for the Web Site option. Enter all required information like the application name, Web Site name, Physical path, IP Address, Port and Host Name > Continue;

- nopCommerce is being installed now. Be patient;

- nopCommerce is successfully installed. Click the Launch nopCommerce link in the screen (it will open IE) and close this installation screen byy clicking Finish. The installation part is finished now.

B: Configuring nopCommerce
- As stated before IE will be opened with the nopCommerce configuration screen (this can take a while for the first time which is normal):

Don’t forget to bookmark this page! - Now you have to enter the name of the SQL server which is going to host the SQL database for nopCommerce. Even though this is a straight forward process it’s important to pay attention to these items:
- Enable the SQL Server to allow remote connections (SQL Server Configuration Manager is used as a tool for this):

- Many times the installation fails because the account isn’t recognized. Create a SQL account which has enough permissions on the SQL instance. In test environments I always make this account (nopCommerce for instance) SA. So no hassles there :).
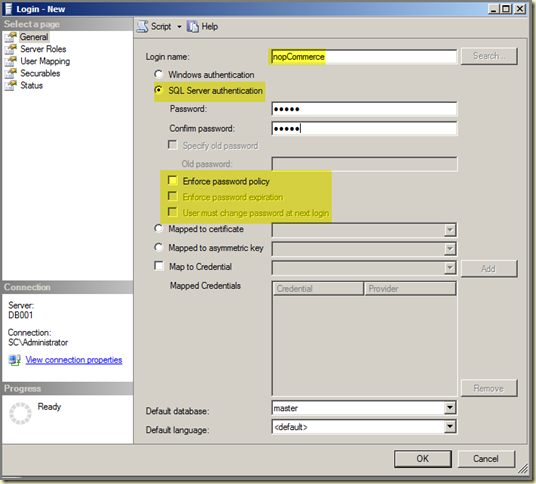
In a test environment you can deselect the option Enforce password policy;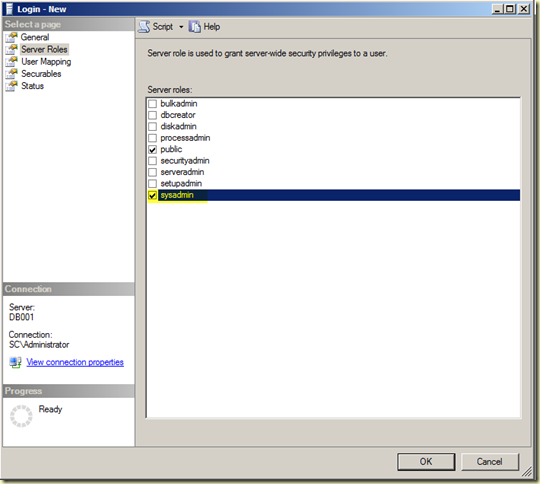
- When the SQL account is created and granted SA permissions, configure SQL Server to accept this type of Server authentication (Microsoft SQL Server Management Studio is used as a tool for this. Connect to the SQL instance, right click it and select Properties. Select Security page and set Server authentication to SQL Server and Windows Authentication mode):

- Make sure the firewalls (when enabled) allow the SQL server traffic to pass through.
- Enable the SQL Server to allow remote connections (SQL Server Configuration Manager is used as a tool for this):
- Now it’s time to fill out the installation page of the nopCommerce web site, item: Store Information.
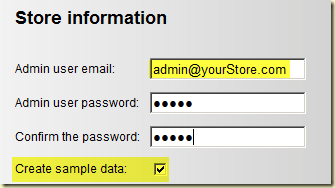
Write down the Admin user email and password. With this information you can administer the website and add the iPad 4 with Windows 8 :). Don’t forget to keep the option Create Sample data selected otherwise your store is EMPTY!!! - Item: Database Information.
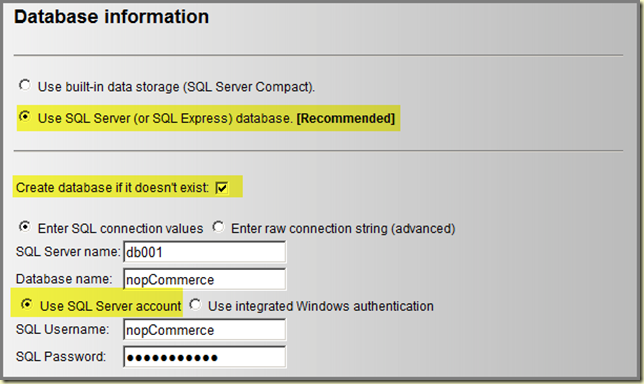
- Select the option Select SQL Server (or SQL Express) database. [Recommended];
- Put a mark in the check box Create database if it doesn’t exist:
- Enter the SQL Server name and the name of the database which is going to be created for nopCommerce;
- Select the option Use SQL Server account. - Now all the required information is provided. Hit the Install button and the noPCommerce database will be created and filled with sample data:

This will take a while, be patient…
Yes, something is happening, the nopCommerce SQL database is created: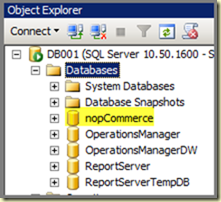
nopCommerce is still under construction:
More patience is needed I guess :) - Yeah baby! noPCommerce is OK:
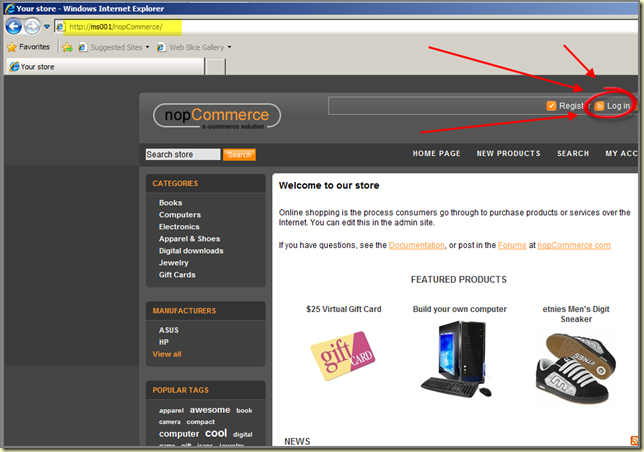
Bookmark this page! - Click on Log in and use the Administrator credentials (see B3) and click Administration. Now you can add your iPad 4 with Windows 8 item:
Now nopCommerce is in place and functional. In a later posting I will describe how to setup OM12 RC for monitoring the nopCommerce web application. So stay tuned!
No comments:
Post a Comment